Sculpture Posture: The Armature

Making the Armature Figure for the piece...

We start by bending the steel rods for the armature.

One challenge in the making of this statue, is designing it to be dismantled for moving, and for making molds at the foundry. It just can't be made as one piece. I know that the figure is going to take a lot more trial and error to complete than the bench. I also know that the bench will get ruined if I have to constantly work over it while I sling around hot wax, fire, and all the other sharp things I use to sculpt with. The armature for the figure needs to stand by itself, and be able to be slid onto/off the bench at any time. The wax figure needs to be sturdy, but very light weight because of this.

My solution is to weld a very simple and linear skeleton out of 3/8 steel rod, bend it into shape, and over-engineer the steel of the right leg to be 3/4 inch steel rod. I will add cardboard cut out silhouettes to the major mass points of the skeleton (rib cage, pelvis,center arm/leg), then fill the figure mass with expanding spray foam. I figure that welding the 3/4 inch steel rod right leg to the steel plate on the floor will support more than the entire weight of the wax and foam figure. The steel skeleton will be ridged enough to hold the sitting pose (especially with the foam reinforcing it) and be thin enough to cut or bend later (when I inevitably see I have made mistakes).

After bending all the rods they get welded together to make up the statue's stance.

I had to put a fire retardant welding blanket over the wax bench as I adjusted and bent the steel armature. This a very long time. It is difficult to imagine and visualize all the proper thicknesses, masses, and relationships of the figure sitting on the bench. It is even more difficult trying to account for the added layers of clothing the figure will wear. The most important part of the armature phase, for me, is making sure the emaciated, tiny looking frame, captures the gesture and feeling of physical gravity that the finished piece will have. If I don't get it before I begin to add wax, I know I will fight the armature throughout the entire process to get there.

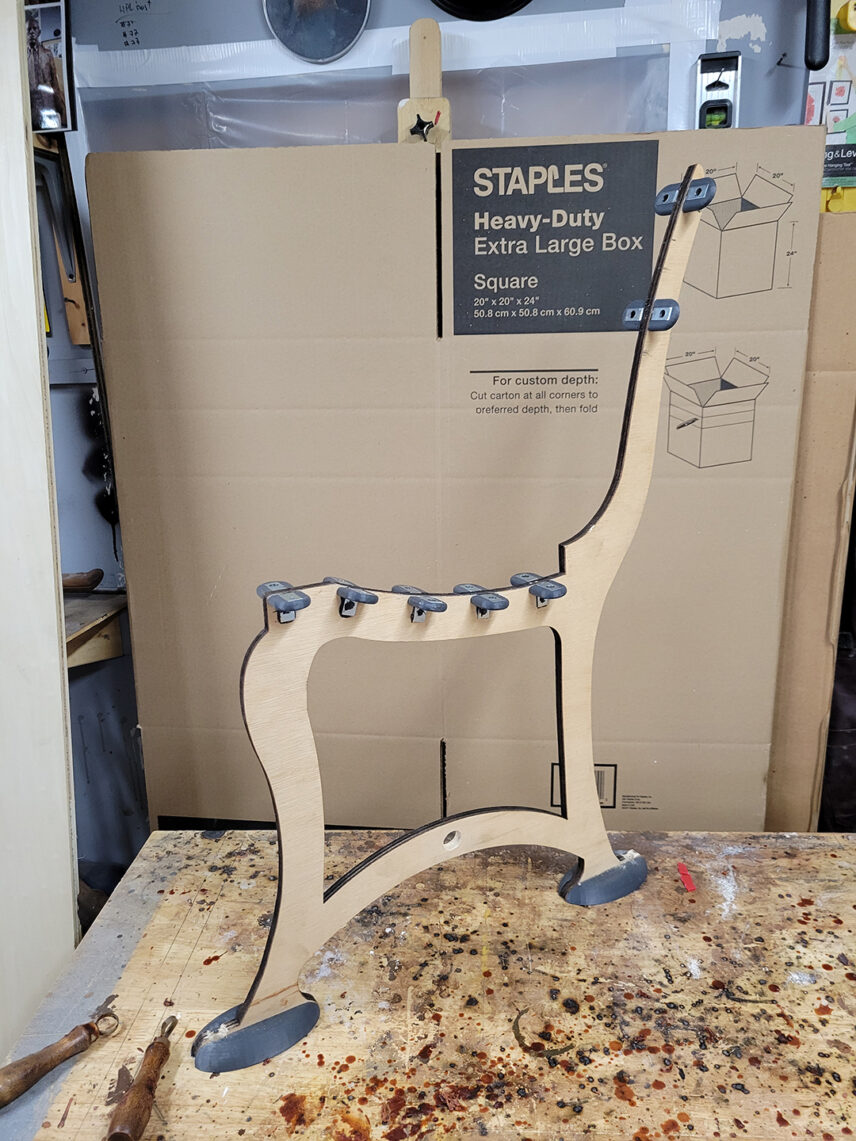
Using makeshift materials to simulate the statue's mass on the bench is helpful when it comes to scale and accuracy.

Without fail, at this stage, everything ends up too close, and too cramped. Even using calipers, and measurements taken from a live model, things look maddeningly thin, small and wrong. You just have to have faith in the numbers, and move forward to the foam carving stage.

Sculpture Base: The Bench

But the work has only just begun...

Bench piece with finished brackets.

Once all of the wood is cut, the brackets epoxied into place, and I've had a successful dry fit, it's time to take the whole thing apart, and apply the wax over-structure. I want each slat to be uniform in dimension, though unique in it's hand modeled texture. I also want the 2 frame pieces to be uniform, but unique in texture.

Now after all that...let's take it apart.

Jig that holds wooden slats as they're covered with wax.

Like a Chocolatier, I want the piece of wood to be the filling in a "wax" candy bar. I build a jig that I can put the wooden slat inside of, then pour hot wax over, to the proper thickness. As the wax cools, I scrape it with a piece of textured wood to keep it the right thickness, and texture the surface with a brush, for the right look. I want it to look like a normal bench from a distance, but appear as if painted in 3 dimensions when close up.

The 2 frame supports were laser cut from a piece of 1/2 inch plywood. I want there to be a nice 3/8 inch raised half moon ridge along the entire edge of the frame piece, on both sides.

Wax-covered frames ready for adding ridges.

Wood dowels encased in wax.

The wax dowels adhered to the frames give it a more realistic look.

Can't forget those details and that texture!

First I brush on a thin layer of wax, so anything I add to the piece will stick. To keep it uniform, I make a rubber mold cast of a 3 foot piece of 3/8 inch round wood dowel. I cast one wax dowel at a time, and bend them around the edge of each frame while they are warm enough not to crack. I secure them in place by brushing on hot wax, and filling in the gaps with slightly cooler wax, on a metal pallet knife.

With all our dowels secured in place, its time to move on...

Look at how much texture the wax adds to the frame!

When the silhouette and form is right, I go back and add multiple layers of brushed on wax until I reach the desired thickness and texture. When all the parts have been coated and textured, I reassemble the bench, making sure to place wax paper between each piece. Otherwise, all the pieces would stick together, and get torn apart when disassembled again.

Now we need to reassemble this...temporarily, anyway.

How else will we be able to make sure it's coming out how we envisioned?

At this point the bench is 90% complete. Now I need to recheck all the dimensions and measurements I took from my live model, and figure out how to make the steel skeleton for the wax figure's armature.

Let's double check our measurements before we get too far in...

Using wax paper in between our components helps protect the pieces from getting damaged during disassembly.

EMB 25 IG

With our measurements looking good, we're ready to start tackling the star of the piece; the Bannister Statue.

Sculpture Concept: It Starts With an Idea

As ever, the project starts with empty space, and an idea...

An empty workspace...but not for long!

Before I can start on the figure, I need to make the base. In this case, the figure will be sitting on a reproduction of a Central Park style bronze bench, from around 1850. It is a mix of the traditional design, and the benches I've seen in pictures of Battery Park in Newport, RI, from the time.

I want the bench to match the figure in terms of texture and patina, so I have to make it from scratch.

Online provided a lot of images and dimensions to work from. So, after a lot of math and scaling things in Photoshop, I knew what I would need in wood to make the bench's skeleton. I had to reduce the thicknesses of the actual slats and framing in wood, so I would be able to add a thickness of wax over the entire surface to model the texture I wanted.

All the pieces have to be made separately so they can be dismantled for casting at the foundry.

Reference photos are very important when it comes to getting things scaled correctly.

Final measurements are taken...and it's onto the next step!

A thick layer of wax must be coated over the entire surface for texture.

Bench parts must be cast separately.

I could not find the right brackets for the benches, and had to make them in a 3D CAD program to be able to 3D print.

Special, perfectly fit brackets are 3D printed for this sculpture.

These brackets are then adhered to the bench and left to dry.

The base the bench sits on is the thickness of the stone curb at the statue site. It is raised on 4 inch wheels, to help me move it around as I work. I cut a large notch out, after working around it for a while, to make it easier to get close to the piece.

Once the brackets dry, we're ready to move on!

This steel plate will bear a majority of the statue's weight.

The bench itself, when cast in bronze, will be welded together, and very strong. This wood and wax bench is not very strong at all, and barely held together with small screws. It can't support the weight of anyone or anything sitting on it. Because of this, the steel skeleton armature, and wax figure will be designed to hover over the bench, welded to the 1/4 inch thick steel plate seen in the last picture.

Town Hall Meeting: Wednesday, Nov. 17th at Providence Art Club

In honor of Edward Mitchell Bannister, painter, abolitionist and philanthropist, a Town Hall meeting was held on November 17, 2021 at the Providence Art Club to help bring awareness of an exciting community art project that is currently underway. A committee has been formed to assist in the realization and installation of a public art sculpture in honor of Mr. Bannister. The goal of the meeting was to create a broader platform for community engagement to promote Bannister’s historic role through education programming, a call for public art and discussion for a Bannister scholarship.

Famously, he was the first known Black artist to win a prize in the U.S.—for his pastoral landscape Under the Oaks at the Centennial International Exhibition; America’s first World’s Fair, which was held in Philadelphia in 1876. Edward Bannister was a dynamic force, founder of the Providence Art Club and helped to transform Providence into a cultural powerhouse. Edward Mitchell and Christiana Carteaux Bannister created extraordinary institutions of art and culture that endure to this day. Now, an ambitious campaign has begun to create a stunning life-size sculpture of the renowned Edward Mitchell Bannister. Future Town Hall meetings will be announced. If you would like to be notified of the next meeting, please contact Nancy Gaucher-Thomas at ngaucherthomas@cox.net.